Welcome


This blog is intended as a finishing tutorial for crafting.

Dedicated to all the hard work of the members of A Crafty Natter, a chat site bringing crafters together from across the globe as a thank you.
Showing posts with label Lacing up you work. Show all posts

Monday, 23 December 2019

Mounting in a hoop


We've already featured how to lace your work to go in a frame and this is quite similar. 

Step 1

Using the outer edge of the smaller ring of your display hoop as a guide, mark and cut out a panel of felt for the rear of your work.

Centre your stitching in your chosen display hoop.

Using #8 pearl thread to match the colour of your fabric and running stitch, follow the shape of your hoop and draw it up, securing with a knot.
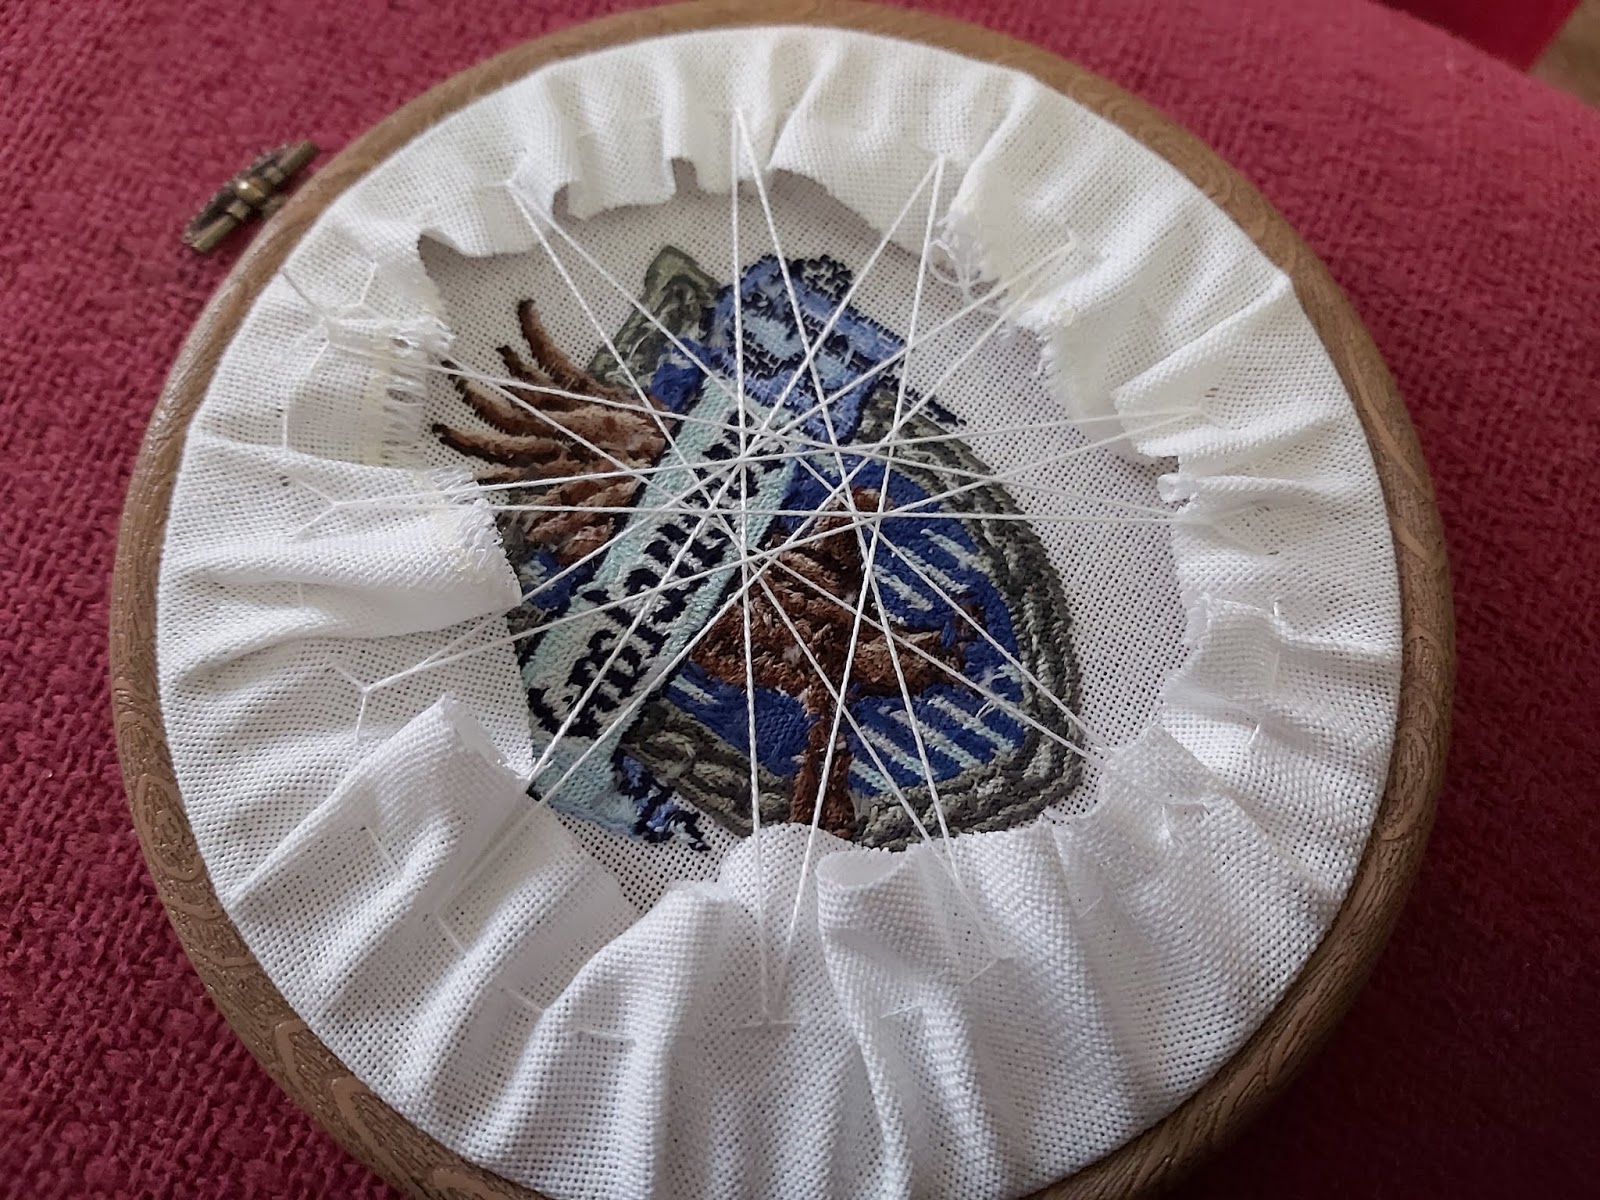


Step 2

Now crisscross another length of pearl thread, pulling the thread taut as you go.


Step 3

Spread a line of fabric glue around the edge of the piece of felt and apply to the rear of your work to both hide and protect it.


Step 4

Place the finished piece between a couple of heavy books to assist with the bonding process for a few hours.


Tuesday, 2 February 2010

Lacing up your work

This tutorial is to show you how to lace up your stitching ready for framing or making into an ornament.

You will need :
Your piece of stitching
Mountboard
Strong cotton
Wadding
Double sided tape
Quilters pins.

Step 1

Cut your mountboard to fit your frame.

Step 2

Iron your stitching flat.

Step 3

Put some double sided tape onto your mountboard and cut some wadding to fit. Place the wadding on top of your taped mountboard.

Step 4

Your covered mountboard

Step 5

Position your stitched piece centrally over your mountboard and pin in place putting the pins through the edge of the mountboard.

Step 6

Continue adding the pins to reduce movement when lacing up your stitching. After pinning your stitching in place you can start lacing up.

Step 7

To start the lacing cut a piece of strong cotton quite a long length ( I used about three metres)
Then fold it in half so you can attach it with  the loop method, this way its nice and secure.

Step 8

Start threading top and bottom to pull the fabric tight over the board, don't overtighten. Continue till you reach the middle.

Step 9

Leave a long end so you can tie it later. Turn it around and lace the other end.

Step 10

You should have two loose ends that have met in the middle, one on either side.
Don't leave them too short.

Step 11

Make sure you pull all the threads tight, don't overtighten them.

Step 12

Tie the two ends together

Step 13

Two sides are now complete, turn it round and start again on the other sides.

Step 14

Start lacing again working into the middle.

Step 15

Again start at the other end and lace into the middle.

Step 16

Pull all the threads to make sure its not slack, don't overtighten it though. Then tie a knot. Once you have tied it remove the pins.

Step 17

This is how your stitching should look after being laced.

Step 18

All laced up and ready for framing.